I recently had dinner with my wife and friends at a great restaurant in DUMBO, and like basically, everyone these days, I wanted to document the delicious food I was eating. For posterity, or whatever.
That night, I happened to have my fancy Fuji X100S with me, but as is often the case, it was just more convenient to use my iPhone. Here's a picture of my entree:

Smoked Long Island duck with daikon radish, lavender, roasted apricot and duck jus
It was the duck and it was delicious. You might even actually believe me, just from seeing that photo, but... let's just be clear, here: food photography is an art, and requires tons of skill and preparation, and at minimum, proper, balanced lighting to make it look good. It's really, absurdly easy to go from appetizing to nauseating when taking pictures of food, particularly with a mobile device, in dim restaurant lighting, which is one reason I rarely post my food shots on social media in the first place. Be realistic with your expectations, y'all.
That said, here are some steps you can take to set yourself up for success:
- First things first: give your lens a wipe with the corner of your t-shirt before shooting. That's an easy win - your image will be much clearer if there's not a schmear of crap on the glass (that's photographer-speak for "lens").
- Also, know your equipment. I'm shooting with an iPhone, and no disrespect to Tim and Jony, but iPhones (and most mobile devices) are happiest in bright sunlight, not the carefully curated ambience of a restaurant. Because of that, in low light situations, make sure to hold your phone as still as possible to avoid camera shake before tapping that shutter button.
- Speaking of avoiding blur, make sure your subject is in focus. Soft edges on food = a pile of gross mush. On iPhone, tap to focus and expose a region of your scene; tap and hold to lock in those settings so you can recompose the shot if necessary. You can slide up or down on the screen to brighten or darken your image.
- Lastly, composition is crucial. Frame your photo at an interesting angle, being sure to keep the clutter out of the frame, and create some depth.
Okay, now that I have my photo, as seen above, there are some basic tweaks to be made in my editing app of choice. If you have an iPhone, you can start with the built-in editing features in the Photos app (bonus: the edits you make will be synced with iCloud, so you can call continue to edit in Photos app on the desktop or other iOS devices).

Tap here to edit!
One of the first things to do is boost the exposure of the image. Almost any image can benefit from a little pop of exposure and/or contrast. Be judicious, though.
The Photos app tries to automatically help you out by offering a "Light" slider that, in many cases will figure out the right combination of exposure, brightness, shadow and highlight tweaks to make your image look good. Just by moving that slider to the right, I'm already in a better place than where I started.

I could stop here, but there's still room for improvement. By tapping the list icon on the right, I can edit individual properties of the image, and have more fine-grained control. Awesome.
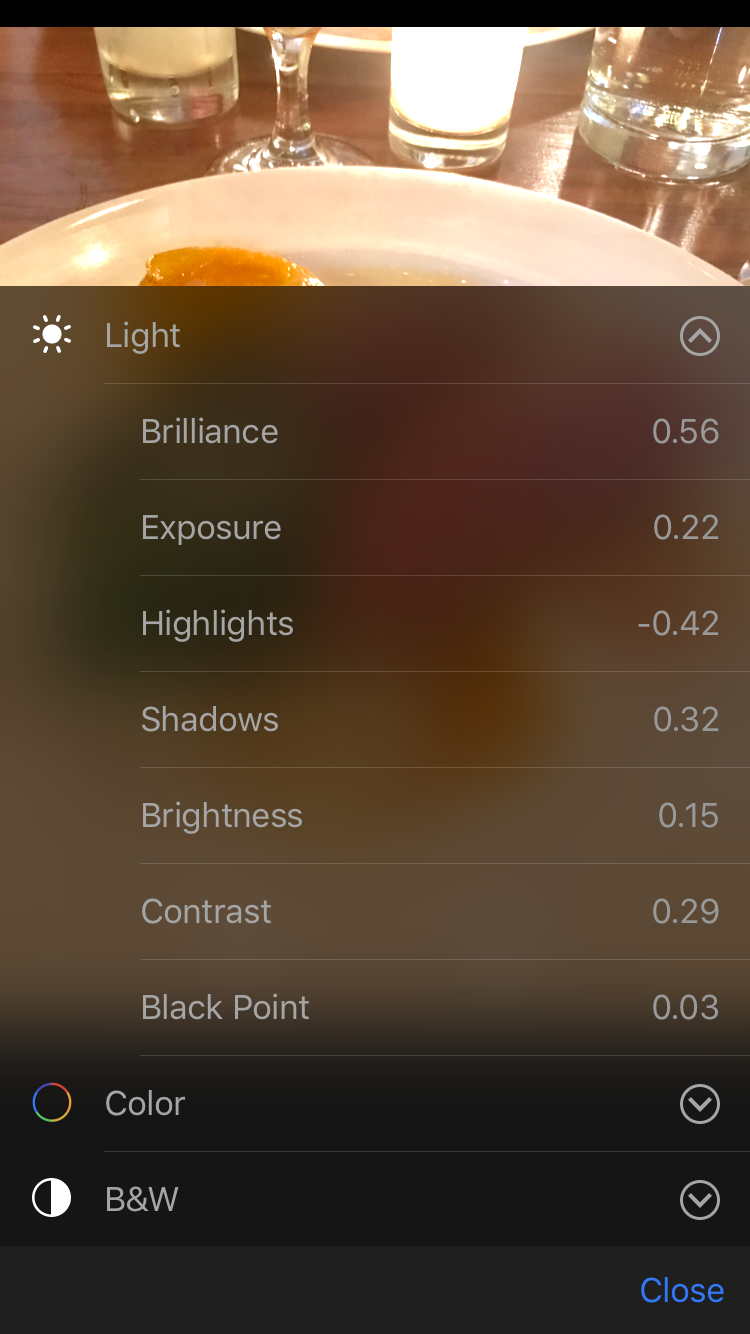
Indoor lights — usually incandescent — can make everything yellow, which isn't great for food photos. A quick tweak to the white-balance, or color cast, under the Color slider, should help.

So here we are, just using the built-in tools that come with iOS:

Again, miles better than where we started. Now, because I'm a fancy photographer-dude, I sometimes like to go beyond the default tools in iOS, and use one of the myriad editing apps that are available in the App Store. One of my favorites is Lightroom Mobile, because of its advanced editing tools and desktop-syncing features (the app is free on iOS/Android, but a Creative Cloud subscription is required for syncing and some of the editing tools). Snapseed, free on iOS and Android from Google, is also a fine choice.
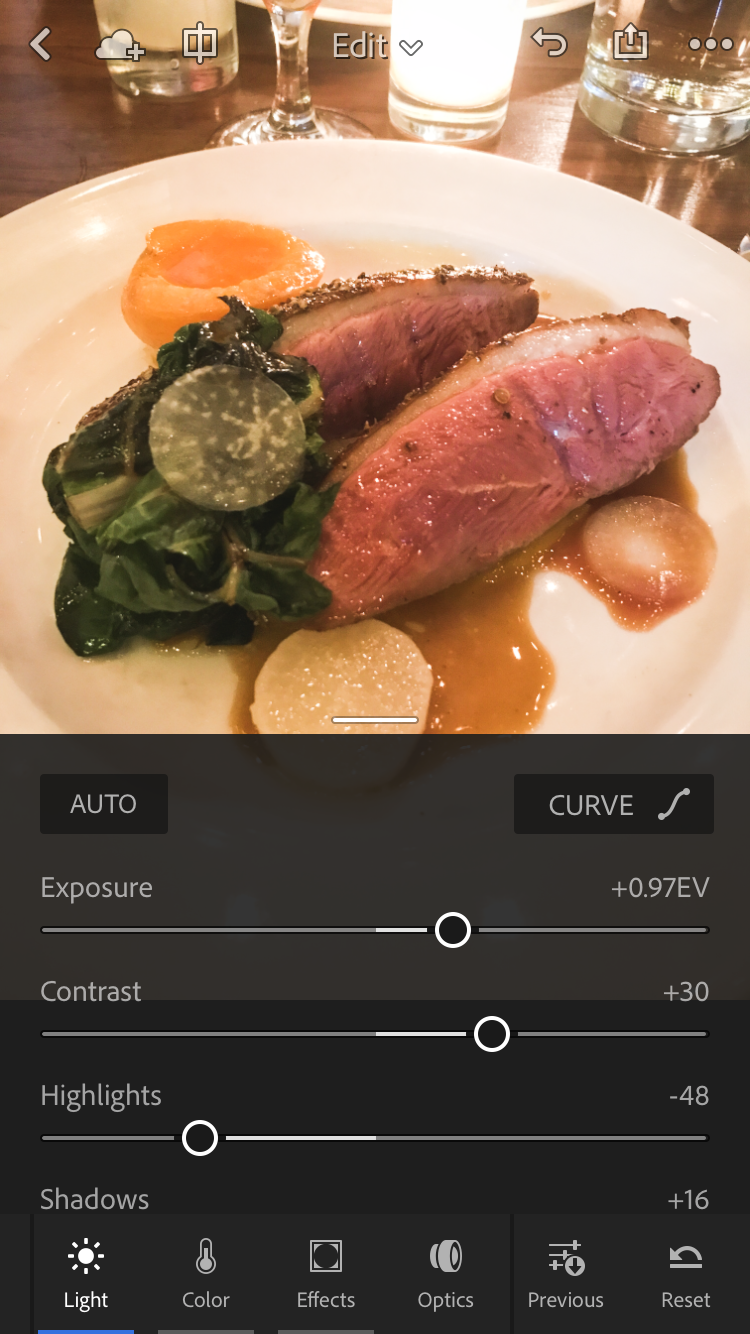
Lightroom Mobile's interface
Here's where I ended up, after correcting the white-balance, performing a Curves adjustment and cropping out some of the distracting highlights on the bottom of the plate:

I also messed around with the hue and saturation of some of the individual colors. Another thing to remember is that, much like a skilled chef cooking a meal would never use every spice in their cabinet, we must resist the temptation to be heavy-handed and use every slider available when editing our photos. Less is very often more.
Anyway, still not quite ready for Bon Appétit, and there's certainly areas that could be improved, but I think it's way more share-worthy than before. And before you ask, yes, I did snap a quick shot of my caramelized banana dessert:

So there you have it: while you probably still won't get hired as a food photographer based solely on tweaks like the ones I've made here, these simple steps you can take to get your food pictures from Good ➡️ Better.